Hey there! I'm a supplier of Solar Fuse Clips, and I often get asked about how to install these little but crucial components. Today, I'm gonna walk you through the whole process step by step.
First off, let's talk a bit about what a Solar Fuse Clip is and why it's important. A solar fuse clip is a key part in a solar power system. It's designed to hold a fuse, which is like a safety guard for your solar setup. If there's an electrical overload or a short - circuit, the fuse blows, cutting off the electrical flow and preventing damage to your expensive solar panels, inverters, and other equipment.
What You'll Need
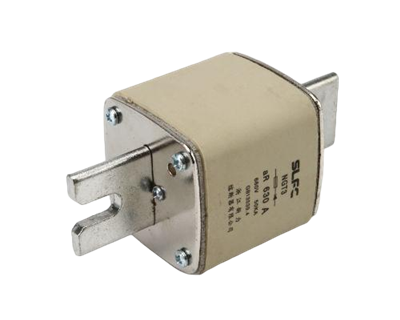
Before you start the installation, you need to gather a few tools and materials. You'll obviously need the Solar Fuse Clip itself. Make sure you pick the right one that's compatible with the type and rating of the fuse you're using. You'll also need a suitable NH PV Fuse or DC Fuse for Solar, depending on your system requirements.
Other tools include a screwdriver (either flat - head or Phillips, depending on the clip's design), wire cutters, and wire strippers. It's also a good idea to have some electrical tape on hand for any extra insulation needs. Safety first, so don't forget to wear some safety glasses and insulated gloves.
Step 1: Safety First
Before you even touch anything electrical, turn off the power to your solar system. This means disconnecting the solar panels from the inverter and any batteries in the system. You don't want to get a nasty shock while you're working! Double - check that the power is off by using a voltage tester on the wires you'll be working with.
Step 2: Prepare the Wires
If you're replacing an old fuse clip, start by removing the wires from the old clip. Use your wire cutters to carefully snip the wires close to the clip. Then, use the wire strippers to remove about half an inch to an inch of insulation from the ends of the wires. You want to expose the bare metal so that it can make a good electrical connection.
If you're installing a new fuse clip as part of a new system, you'll need to measure and cut the wires to the appropriate length first. Make sure you leave enough slack so that the wires aren't pulled tight when the clip is installed.
Step 3: Mount the Fuse Clip
Now it's time to mount the Solar Fuse Clip. Most fuse clips come with holes for screws. Find a suitable location in your solar panel junction box or the electrical enclosure where you want to mount the clip. Make sure it's in a place where it's easily accessible for future maintenance.
Line up the holes in the clip with the holes in the mounting surface. Insert the screws through the holes and use your screwdriver to tighten them down. Make sure the clip is firmly attached and doesn't wiggle around.
Step 4: Insert the Fuse
Take your NH PV Fuse or DC Fuse for Solar and carefully insert it into the fuse clip. Most clips have a spring - loaded design that will hold the fuse in place. Make sure the fuse is fully seated in the clip and that there's good contact on both ends.
Step 5: Connect the Wires
Once the fuse is in place, it's time to connect the wires to the fuse clip. The clip usually has two terminals where you can attach the wires. Loosen the screws on the terminals using your screwdriver.
Take one of the stripped wires and insert it under the screw on one of the terminals. Tighten the screw down firmly to hold the wire in place. Repeat this process for the other wire on the other terminal. Make sure the wires are securely attached and that there's no loose connection.


Step 6: Insulate the Connections
After connecting the wires, use some electrical tape to wrap around the connections. This will help prevent any short - circuits and protect the connections from moisture and dust. Wrap the tape tightly around the exposed metal parts of the wires and the terminals.
Step 7: Test the System
Now that everything is installed and connected, it's time to test the system. Reconnect the solar panels to the inverter and any batteries. Turn on the power and use a multimeter to check the voltage and current in the system. Make sure everything is working as it should. If you notice any issues, like a blown fuse or abnormal readings, turn off the power immediately and double - check your installation.
Troubleshooting
Sometimes, things don't go as smoothly as planned. If the fuse blows right after you turn on the power, there could be a short - circuit in the system. Check all the wire connections to make sure there are no loose wires or exposed metal that could be causing a short.
If the fuse clip gets hot during operation, it could mean that there's a poor connection between the fuse and the clip or between the wires and the clip. Tighten all the screws and make sure the connections are secure.
Why Choose Our Solar Fuse Clips
As a supplier of Solar Fuse Clip, I can tell you that our products are top - notch. We use high - quality materials to ensure durability and reliability. Our clips are designed to provide a secure hold for the fuses, reducing the risk of loose connections. And we offer a wide range of options to fit different fuse types and ratings, so you can find the perfect clip for your solar system.
If you're in the market for Solar Fuse Clip, NH PV Fuse, or DC Fuse for Solar, don't hesitate to reach out. We're here to help you with all your solar fuse needs. Whether you're a DIY enthusiast or a professional installer, we've got the products and the knowledge to support you. Contact us for more information and let's start a conversation about your solar power system requirements.
References
- "Solar Power Systems Installation Guide" - General industry guide on solar system components and installation.
- "Electrical Safety Handbook" - Handbook for electrical safety practices, especially relevant for working on solar systems.