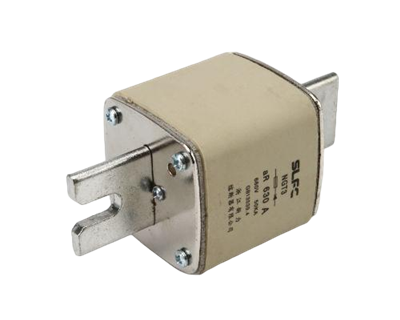
Installing a solar fuse clip on a solar panel mounting structure is a crucial step in ensuring the safety and efficiency of your solar power system. As a trusted Solar Fuse Clip supplier, I'm here to guide you through the process, sharing professional insights and practical tips.
Understanding the Importance of Solar Fuse Clips
Before we dive into the installation process, let's first understand why solar fuse clips are essential. Solar fuse clips play a vital role in protecting your solar panels and the entire electrical system from overcurrent situations. In the event of a short circuit or other electrical faults, the fuse within the clip will blow, interrupting the current flow and preventing damage to the equipment. This not only safeguards your investment but also reduces the risk of fire and other safety hazards.
There are different types of fuses used in solar applications, such as DC Fuse for Solar, 1000VDC Fuse, and NH PV Fuse. Each type has its own specifications and is designed to meet specific requirements of the solar system.
Pre - installation Preparations
Gather the Necessary Tools
To install a solar fuse clip, you'll need the following tools:
- Screwdriver (either flat - head or Phillips - head, depending on the type of screws used in the mounting structure)
- Wrench set
- Wire strippers
- Electrical tape
- Multimeter (for testing the electrical connections)
Select the Right Fuse Clip
Choose a fuse clip that is compatible with the type and rating of the fuse you'll be using. Consider factors such as the voltage and current ratings of your solar panels and the overall electrical system. Our company offers a wide range of high - quality solar fuse clips to meet different needs.
Safety First
Before you start the installation, make sure to turn off the power supply to the solar panel system. Wear appropriate personal protective equipment (PPE), including safety glasses and insulated gloves, to protect yourself from electrical shock and other potential hazards.
Step - by - Step Installation Process
Step 1: Locate the Mounting Position
Determine the ideal location for the solar fuse clip on the solar panel mounting structure. The location should be easily accessible for maintenance and inspection, and it should be away from any sources of heat or moisture. It's also important to ensure that the mounting surface is flat and sturdy.
Step 2: Prepare the Mounting Surface
Clean the mounting surface to remove any dirt, debris, or rust. If necessary, use sandpaper to smooth the surface. This will ensure a secure and stable installation of the fuse clip.
Step 3: Mount the Fuse Clip
Align the fuse clip with the pre - drilled holes on the mounting structure. Insert the screws through the holes in the fuse clip and into the mounting structure. Use a screwdriver or wrench to tighten the screws securely. Make sure the fuse clip is firmly attached to the mounting structure and does not wobble.


Step 4: Connect the Wires
Strip the insulation from the ends of the wires that will be connected to the fuse clip. The length of the stripped wire should be appropriate for the terminal connections on the fuse clip. Insert the stripped wires into the terminals of the fuse clip. Tighten the terminal screws to secure the wires in place. Use a multimeter to test the electrical connection to ensure there is no loose connection or short circuit.
Step 5: Install the Fuse
Insert the appropriate fuse into the fuse clip. Make sure the fuse is properly seated in the clip and that the contacts are in good contact with the terminals of the fuse clip. Check the rating of the fuse to ensure it matches the requirements of your solar system.
Step 6: Inspect the Installation
Once the installation is complete, visually inspect the fuse clip and the wire connections. Check for any loose screws, damaged wires, or other signs of improper installation. Use a multimeter to test the electrical continuity and voltage across the fuse clip to ensure it is functioning correctly.
Post - installation Checks
System Testing
After the installation, turn on the power supply to the solar panel system. Monitor the system for a period of time to ensure that it is operating normally. Check the voltage and current readings of the solar panels and the electrical system to ensure they are within the expected range.
Regular Maintenance
Regularly inspect the solar fuse clip and the entire electrical system for any signs of wear, damage, or overheating. Replace the fuse if it has blown or if it shows signs of damage. Keep the fuse clip clean and free from dirt and debris.
Conclusion
Installing a solar fuse clip on a solar panel mounting structure is a relatively straightforward process if you follow the proper steps and safety precautions. As a Solar Fuse Clip supplier, we are committed to providing high - quality products and professional support to our customers. If you have any questions or need further assistance with the installation or selection of solar fuse clips, please don't hesitate to contact us for procurement and in - depth discussions. We look forward to helping you ensure the safety and efficiency of your solar power system.
References
- Solar Energy International. (20XX). Solar PV System Design and Installation Handbook.
- National Electrical Code (NEC). (20XX). Electrical Safety Standards for Solar Power Systems.
- Manufacturer's Installation Manuals for Solar Fuse Clips and Related Components.