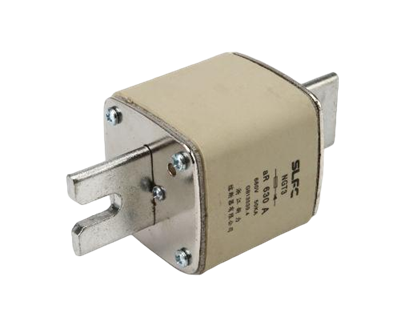
Hey there! As a supplier of RT18 - 32 Fuses, I'm super stoked to share with you how to install these fuses correctly. Whether you're a DIY enthusiast or a professional electrician, getting the installation right is crucial for the safety and proper functioning of your electrical system.
Why RT18 - 32 Fuses?
Before we jump into the installation process, let me tell you a bit about why RT18 - 32 fuses are so great. These fuses are designed to provide reliable over - current protection in a wide range of electrical applications. They're known for their high interrupting ratings and long - lasting performance. Plus, they're compatible with a variety of fuse bases, like the RT18 - 32 Base, RT18 - 32 1P Fuse Base, and RT18 - 32 Fuse Holder Base.
Pre - installation Checks
First things first, safety should always be your top priority. Before you start installing the RT18 - 32 fuse, make sure to turn off the power supply to the circuit where you'll be working. This will prevent any electrical shocks or short - circuits.
Next, you'll want to check the fuse rating. The rating of the RT18 - 32 fuse you're using should match the requirements of the electrical circuit. Using a fuse with the wrong rating can lead to overheating or failure to protect the circuit in case of an over - current situation.
Also, take a good look at the fuse and the fuse base. Make sure there are no visible signs of damage, like cracks or burns. If you notice any damage, don't use the fuse or the base. Instead, replace them with new ones.
Tools You'll Need
To install the RT18 - 32 fuse, you won't need a whole bunch of fancy tools. Here's what you'll need:
- A pair of insulated pliers: These will come in handy for handling the fuse and making sure you don't get shocked.
- A voltage tester: This tool will help you confirm that the power is off before you start working.
- A clean, dry cloth: You can use this to wipe down the fuse and the fuse base to remove any dust or debris.
Installation Steps
Step 1: Prepare the Fuse Base
If you're using a new fuse base, you'll need to mount it properly. Follow the manufacturer's instructions for mounting the RT18 - 32 Base, RT18 - 32 1P Fuse Base, or RT18 - 32 Fuse Holder Base. Usually, this involves using screws or clips to secure it to a panel or a mounting surface.
Once the base is mounted, use your voltage tester to double - check that the power is still off.
Step 2: Insert the Fuse
Take your RT18 - 32 fuse and hold it carefully with your insulated pliers. Align the fuse with the slots in the fuse base. Make sure the fuse is inserted straight and evenly. You should feel a slight resistance as you push the fuse into the base.
Don't force the fuse in if it doesn't fit easily. Check to make sure you're using the correct type of fuse for the base and that there are no obstructions in the slots.
Step 3: Secure the Fuse
After inserting the fuse, give it a gentle tug to make sure it's securely in place. If the fuse moves or comes out easily, it might not be properly seated. In that case, remove the fuse and try inserting it again.


Step 4: Restore Power
Once you're confident that the fuse is installed correctly, it's time to restore power to the circuit. Turn on the power supply and use your voltage tester to confirm that the circuit is live.
Keep an eye on the circuit for a few minutes to make sure everything is working properly. If the fuse blows immediately, it could mean there's a problem with the circuit, like a short - circuit. In that case, turn off the power again and troubleshoot the issue.
Troubleshooting Tips
- Fuse blows right away: As I mentioned earlier, this could be due to a short - circuit in the circuit. Check for any loose wires, damaged components, or other signs of a problem.
- Fuse gets hot: If the fuse gets hot during normal operation, it could be a sign that the fuse rating is too low for the circuit. Replace the fuse with one that has a higher rating.
- Fuse doesn't fit properly: Make sure you're using the correct type of fuse for the base. Also, check the base for any damage or debris that might be preventing the fuse from fitting correctly.
Conclusion
Installing an RT18 - 32 fuse correctly is not that difficult if you follow these steps. Remember, safety is key, so always turn off the power before you start working and use the right tools.
If you're in the market for high - quality RT18 - 32 fuses or any of the related fuse bases, we've got you covered. We're a reliable supplier with a wide range of products to meet your needs. If you have any questions or want to discuss your procurement requirements, don't hesitate to reach out. We're here to help you find the best solutions for your electrical projects.
References
- Electrical Safety Standards Handbook
- Manufacturer's Manual for RT18 - 32 Fuses